Activity 1
At this age, it is important that children achieve proper crayon handling in order to improve fine motor skills. One was of achieving this goal is simply by giving the child blank papers and colours so that they can colour without boundaries, gaining practice in handling the colour while stimulating their creativity.

Activity 2
Children in the class are exposed to play-dough, which is home-made. With play-dough, children improve hand movement, enhance fine-motor skills and enjoy being creative. It's different from plasticine since it's softer, easier to handle and less messy!
Here is an easy recipe that we use. The most difficult ingredient to find is the cream of tartar. However, most leading supermarkets have it. Some people substitute cream of tartar for lemon drops.
Ingredients
- 1 cup flour
- ½ cup salt
- 2 tsps cream of tartar (or 1/4 tsp of lemon juice)
- 1 cup water
- 1 tbsp oil
- Food coloring
Method:
First, combine flour, salt and cream of tartar in a saucepan. Mix liquids and gradually stir them into the dry ingredients. When the mixture is smooth, cook over medium heat, stirring constantly until a ball forms. Remove from heat and knead until smooth. Store in a closed bag or stretch and seal.

The Learning benefits from the use of playdough:
- Self-expression
- Imagination and creativity
- Building and strengthening fine motor skills
- Eye and hand coordination
- Problem solving – using play dough to join parts together
Activity 3
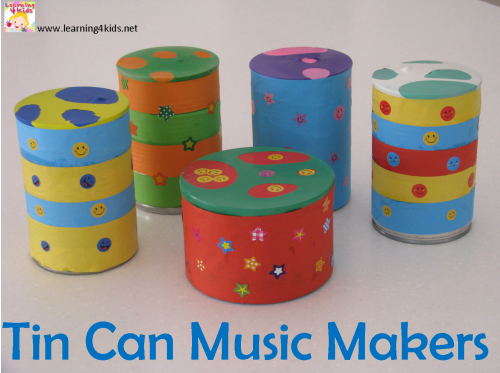 These Tin Can Music Shakers are a simple homemade musical instrument to make and you will find most of the materials around the home.
We play a lot of music in our home and the Tin Can Music Makers were so much fun and a great addition to our creative play.
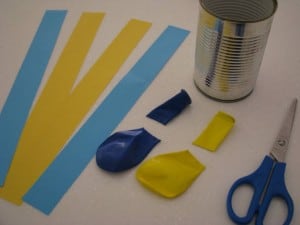
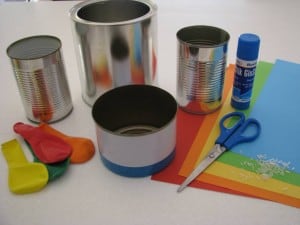 You will need coloured paper, clean recycled tin cans, balloons, scissors, glue, stickers and rice or other fillings for the shaker. We also used coconut shavings, dried split peas and uncooked pasta to create different sounds such as soft and loud. My girls had fun trying to pick which item was making that sound when they shook the tin.
Learning experiences from making a homemade Tin Can Music Makers:
- Develop a sense of pride and achievement.
- Encourages and promotes imaginative play and creativity.
- Fine motor development and eye-hand coordination.
- Getting little bodies moving through dance and rhythm.
- Fun!
Ghost Toasts

Looking for a treat that truly embodies the spirit of Halloween? Try serving some of these flavourful phantoms.
Ingredients
- White Bread (1 slice per ghost)
- Whipped cream cheese
- Currants
Instructions
1. For each, toast a slice of white bread and then cut a ghost shape from it. You can do this freehand using a knife, or you can use a gingerbread-girl cookie cutter.
2. When the cut outs have cooled, spread on a generous coating of whipped cream cheese.
3. For eyes and mouths, add currants
Activity 5
Supplies:
- Egg carton (preferably cardboard)
- Black or purple paint or marker
- Three pipe cleaners
- Googlie eyes
STEP ONE: Cut one of the 12 bottom pieces of your egg carton out. Paint or color it the color of your choice.
STEP TWO: Cut the three pipe cleaners into thirds, making a total of 9 pieces. You can discard one as you only need eight legs for a spider. Pierce eight holes near the bottom of your egg holder around the spider body. I used a scrapbooking paper piercer to do this. Then insert the pipe cleaners into each hole. My daughter was able to do that part herself once I had pierced the holes.

STEP THREE: Using a small amount of glue, glue on googlie eyes and your spider is DONE! We actually pierced an additional hole through the top and strung string through it (tying a knot on the inside of the holder to hold it) so we could hang the spiders from above. I didn’t get a picture of that yet though!

Activity 6
How to Make Puffy Paint?
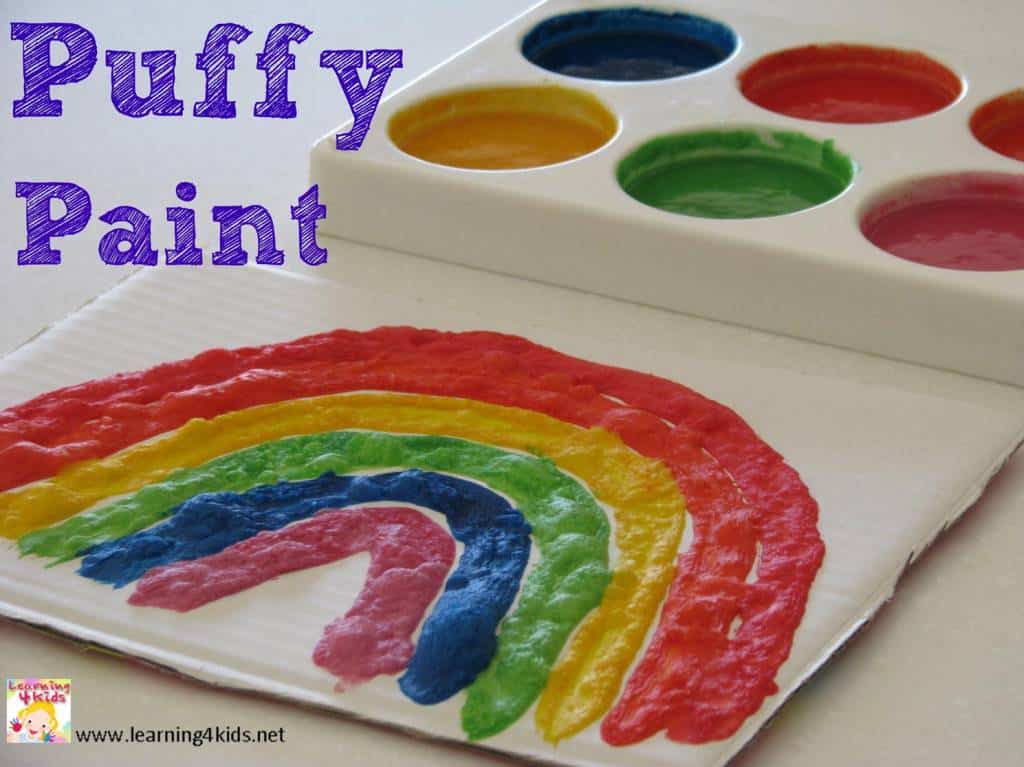
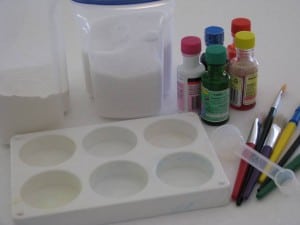
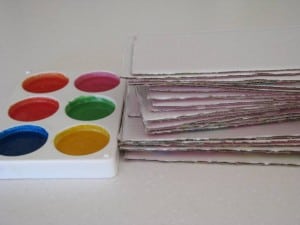 You will need self-raising flour, salt, food colourings, paint brushes, paint tray, measuring spoons, water and cut up pieces of cardboard.
There are a number of recipes out there for puffy paint but I had a bit of an idea of what was included and had a play around with the main ingredients until I found the right consistency and quantity for our paint pots. Here is the recipe that I found to work well.
Recipe for Puffy Paint
1 Tablespoon Self Raising Flour
1 Table Spoon Salt
3 Teaspoons Water
Food Colouring
Continually mix the ingredients with a paint brush until all ingredients have combined well into a paste.
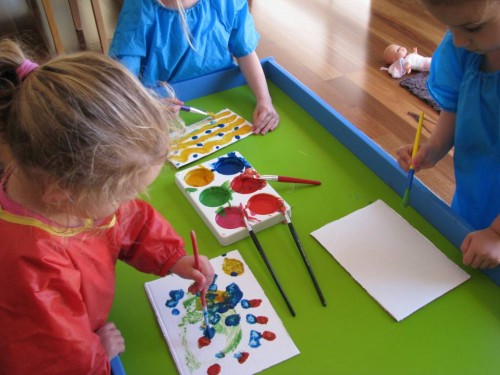
We used thick cardboard that I cut up from an empty nappy box and also cut the cardboard into smaller sizes to fit into the microwave. My girls’ just painted one picture after the other until all the puffy paint and cardboard was gone! I would recommend that the paint be painted on thick so when they are cooked they are extra puffy!
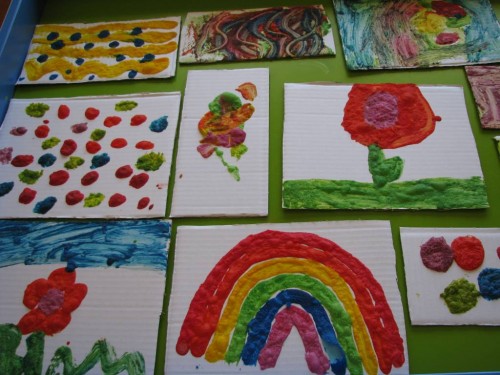
When the paintings were all finished we placed a microwavable bowl in the centre of the microwave and put 1 painting at a time on top of the bowl. Different microwaves will require different times; this is something you will have to trial to see how long you need to cook the puffy paint to make it puff. Our microwave roughly took 25 seconds to puff the paint but I did stop at intervals to check that I was not overcooking the puffy paint. The puffy paintings should come out warm not hot, so keep an eye on the time to avoid over cooking. The learning benefits of this activity:
- Encourages creativity and self-expression with paint
- Eye and hand coordination
- Fine motor development
- Experimenting and exploring with a new paint tool
- Sense of achievement and pride
- Colour recognition
Activity 7
Paint Pops
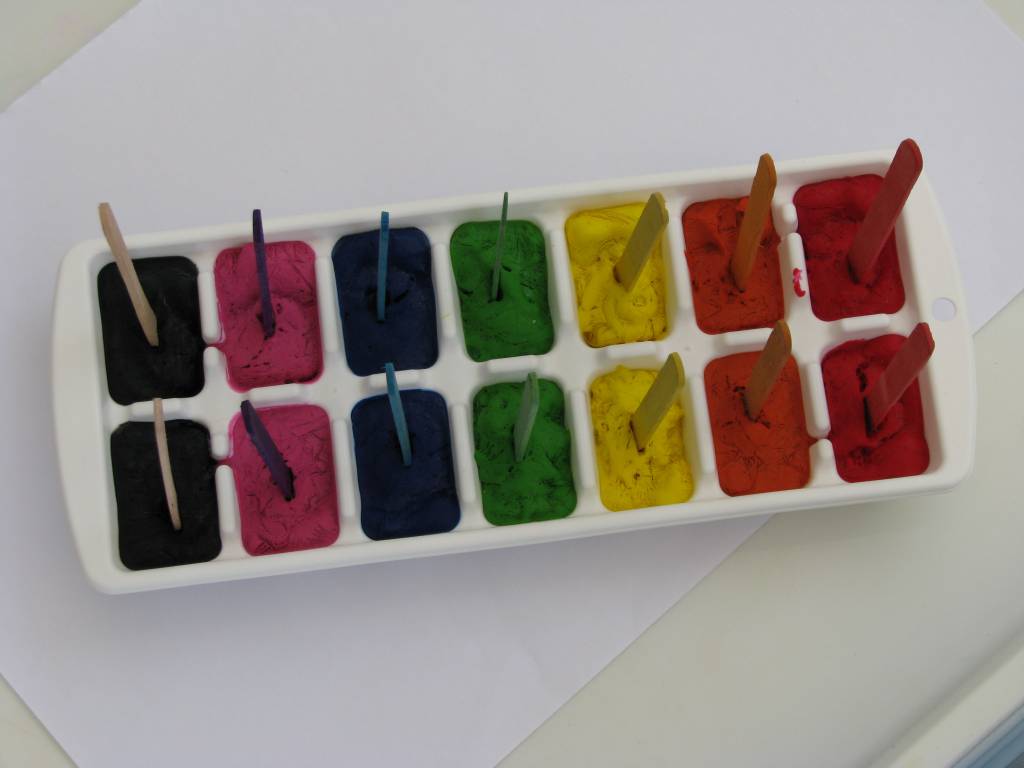
 You will need paint, ice cube tray, pop sticks, paper and a divided paint tray. We froze the paint a little then took them out the freezer to place in the pop sticks. When we were ready to use the frozen paint pops we placed them in the sun for little to slightly melt them and remove them from the tray.

 Some of the paint pop creations made by Miss 4 and 5; a garden of flowers and a boat on the sea. Miss 4 loved to just mix the colours together on the paper, making new colours.

 Making patterns and swirls with the paint pops! These will make great wrapping paper for Nanny’s birthday present!
Learning links with this activity:
- Self-expression with paint
- Eye and hand coordination
- Fine motor development
- Experimenting and exploring with a new paint tool
- Sense of achievement and pride
Rudolph Reindeer Cookies

A simple Christmas cookie recipe that is a lot of fun for kids.
Makes 16 cookies
- 2 cups spelt flour
- 1 1/2 teaspoons baking soda
- 1/4 teaspoon sea salt
- 1 cup smooth natural peanut butter
- 3/4 cup pure maple syrup
- 32 chocolate chips
- 32 small pretzels
- 16 small Swedish berries, dried cranberries or dried cherries
Preheat the oven to 350°F. In a medium-sized mixing bowl, combine the flour, baking soda and sea salt. In a separate smaller bowl, whisk together the peanut butter and maple syrup until smooth. Add the peanut butter/syrup mixture to the flour mixture in the medium-sized bowl and mix until combined. Roll a tablespoon-size amount of dough in your hands to make a ball. Create a point on the bottom edge of the dough for the reindeer’s’ face. Place the dough ball onto a parchment lined baking sheet and press down slightly with your hand. Leave a 1 1/2 space between the cookies on the pan, as they will expand. Add 2 chocolate chips for the eyes, two pretzels for the antlers and a Swedish berry, dried cranberry or dried cherry for the red nose. Repeat to make 16 cookies. Place in the oven to bake for 8-10 minutes.
You can use smarties too !!!!!!!!!!!
Activity 9:
Snowman Jars by Art Craft Ideas.
Recycle your jars and let your kids make cute snowmen to line a shelf or table. Just fill the jars with cotton batting and decorate with googly eyes and buttons. Use fabric, ribbon, cupcake liners, pipe cleaners or any other trim that you have for extra embellishments.
Activity 10;
The Angelic Glitterati
Take a longish pine cone and cut off the tip which will create a skirt for the angel. Here's a before and after pic.
Then a grown-up glue-guns a wooden bead to the top. Children can then *paint faces, glue on glitter to make sparkly gowns and glue feathers to them to make wings. We also formed halos out of pipe cleaners, put glue on the ends and poked them into the top of the bead.
This basic pine cone angel has a multitude of options. We could have added pipe cleaner arms, given them more accessories and added other trimmings but our time was short. Still, this simple little project made the children very, very happy. However, I'm still sneezing glitter ;)
Activity 11;
Today I wanted to share how to make Baby Food Snow Globes. They are definitely a favorite project in our house...and with a seven month old baby, I am always looking for ways to use my leftover baby food jars.
What you need:
• Baby food jars, (or any small jar for that matter)
• Plastic toys that will fit into your jar (I used small Christmas Ornaments)
• Glitter
• Silicone Sealant
• Glue Gun
• Water
Step 1
Wash and dry your jar completely, including the lid.
Step 2
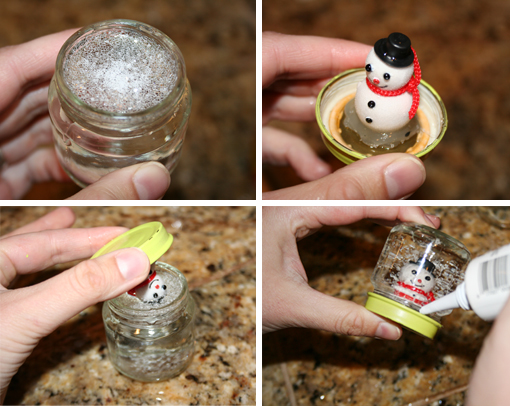
Attach figurine to the inside of jar lid using glue gun. Use your imagination, but make sure whatever you use is waterproof and won't dissolve. (tip: If you are using a small object, it's a good idea to build up the lid with extra hot glue or polymer clay so the object will appear taller.
Step 3
Fill jar almost to the top with cold water. Then sprinkle some glitter, or “ snow” into water.
Step 4
Line inside lip of the lid with silicone sealant (or hot glue if that is all you have). Then insert figurine in water and screw on lid. Do this over the sink, as the water overage will spill out. The higher you fill the jar, the less air bubbles will remain once you screw on the lid.
Step 5
Dry off your snow globe completely. Apply a layer of hot glue or silicon sealant around the rim of the lid to seal shut. Let stand and dry overnight.
Step 6
Activity12:
Police Notepad Instructions

Items Needed:
-Blue Construction Paper
-White Letter Paper
-Pipe Cleaner
-Scissors
-Black Marker
-Hole Punch (optional)
Instructions:
-Draw a star on the blue construction paper as large as you want the notepad.
-Fold the paper and then cut out 2 stars.
-Cut out the same star pattern on as many white letter papers as you want in your notepad.
-Put one blue star on top of the white letter paper and one blue star behind the white letter paper.
-If you have a hole punch, use it to punch out 2 holes at the top of one of the points of the star. If not, just use the scissors to make a hole large enough to put pipe cleaner through.
-From the back, put the pipe cleaner through one hole bringing it to the front and then in the other hole, bring the pipe cleaner to the back. Twist the 2 ends of the pipe cleaner together.
-Using the black marker, write "POLICE" on the front of the star. If you have letter stencil's you can use those, but letting your child write police by themselves, give this craft something a little special.

Items Needed:

After they were done putting their tissue paper on, I cut off all the excess paper hanging off the edge. Don't worry about it not looking pretty. Next
take the other butterfly you cut out and lay that over the side of the
butterfly you just trimmed the tissue paper off of. If you need to trim
off an other little
pieces.
 Finally, display proudly and beautifully in your window.

Love it ! !
Activity13:
Dog Sock Puppet Instructions

Items Needed:
-White Sock
-Black Construction Paper (or black felt)
-Pink Construction Paper (or pink felt)
-small brown pom pom
-2 wiggly eyes
-Black Marker
-Scissors
-Glue
Instructions:
-Cut out 2 ears out of the black construction paper.
-Cut out a tongue out of the pink construction paper. Use the black marker and make a line down the middle of the tongue.
-Place
the sock on your hand. Fold your hand in half. Glue the eyes on the top
of the sock. Glue the pom pom on the tip of the sock for the nose. Glue
the ears on either side of the eyes. Open up your hand, and in the
middle of your palm, glue the tongue
Activity 14
Love doorhanger
What you'll need: - 1-2 pieces of red craft foam
- 1 piece of white craft foam
- 1 piece of pink craft foam
- White ribbon
- 3 jingle bells
- Hole punch
- Glue
- Heart Template
- Letter Templates
How to make your love door hanger craft:
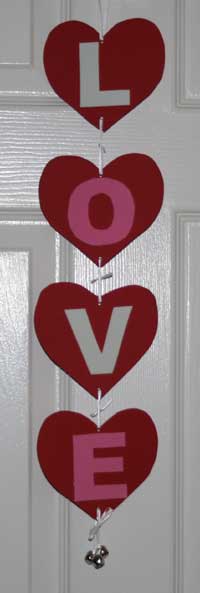
- Print out the template and cut out the pieces. Trace the heart shape onto red craft foam. You will need 4 red hearts. Trace the letters "L" and "V" onto white craft foam and the "O" and "E" onto pink craft foam. Cut out all of these pieces.
- Glue one letter onto each heart.
- Punch a hole in the top and bottom of each heart (in the center of the top of the heart and the center of the very bottom of the heart).
- Cut small pieces of ribbon (3-4 inches) and use the ribbon to tie the bottom of one heart to the top of the next in order so you spell out the word "LOVE". At the top of the "L" heart use a longer piece of ribbon to use as a hanger. At the bottom of the "E" heart thread 3 jingle bells onto the ribbon and then tie it onto the heart.
- Hang your craft on the door.
Activity 15:
Stained Glass Butterflies
Spring has finally hit, so bring on the butterfly crafts !
This
adorable craft is super easy for the kiddos, minimal work for the mamas
and requires very little supplies. . . black construction paper,
different colored tissue paper and a glue sticks. Simple enough right ? ?
First
off have your little one put glue all along the butterfly outline. and
proceed to put four pieces of tissue paper on. . at this point don't
worry about the tissue paper hanging off the edges,
I found a butterfly template online, printed it
out and traced that onto four pieces of paper, than I shrunk it and
traced the smaller one onto another four pieces of paper.
just make sure its stuck on there good.

After they were done putting their tissue paper on, I cut off all the excess paper hanging off the edge. Don't worry about it not looking pretty.
 Next
take the other butterfly you cut out and lay that over the side of the
butterfly you just trimmed the tissue paper off of. If you need to trim
off an other little
pieces.
  Finally, display proudly and beautifully in your window.
Love it ! !
Activity 16
PAPER CUP CHICK
Materials:
yellow paper cup
scissors
white glue
google eyes
orange, yellow construction paper
optional: pink construction paper, feathers, green pipe cleaner
There are a couple different options for your little paper cup chicks. We will give you instructions for the basic paper version. (Adding feathers is as simple as gluing them on instead of using construction paper.)
Activity 17
Materials
PAPER CUP CHICK
Materials:
yellow paper cup
scissors
white glue
google eyes
orange, yellow construction paper
optional: pink construction paper, feathers, green pipe cleaner
There are a couple different options for your little paper cup chicks. We will give you instructions for the basic paper version. (Adding feathers is as simple as gluing them on instead of using construction paper.)
- Cut yellow construction paper into strips about two inches wide. Have your child cut a fringe on one side of the construction paper (to represent feathers). This is a great first cutting project since the kids practice the hand motion of opening and closing the scissors. My two year olds cut all the fringe on our project.
- With the cup upside down, glue on the strips of fringe yellow to the cup
- Out of Yellow Construction paper - Cut an oval or circle for the face. (You can trace the bottom of the cup or free draw an oval)
- Cut an oval for the wings - now cut that oval in half to create a pair of wings
- Cut a small orange triangle for the beak
- Cut an orange heart for the feet. Now cut little triangles to make the "toes"
Activity 17
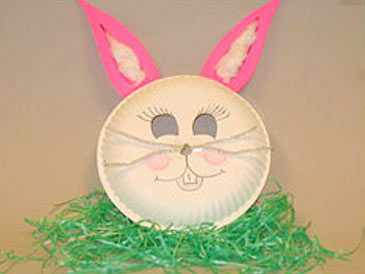
Easter Bunny Mask

Materials
- Paper plate
- Scissors
- Pink construction paper
- Glue
- Pink or white pipe cleaners
- Yarn
- Hole punch
- Turn a paper plate into a bunny mask.
- Hold the plate against your child's face and mark where the eyes and nose holes should be.
- Cut out the holes for the eyes and nose.
- Cut out bunny ears from pink construction paper and glue to the plate.
- Use pipe cleaners for whiskers.
- Punch a hole on each side of the plate, and attach two pieces of yarn on both sides to tie the mask onto your little bunny's head.


No comments:
Post a Comment